Steps
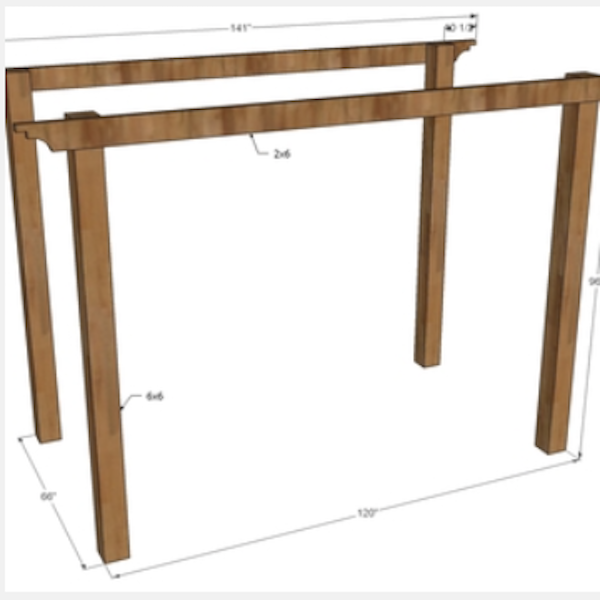
STEP 1
Carefully space 6x6 posts out on level surface, 120” apart from outside to outside. Mark 141” long rafters, 10-1/2” in from ends on each end. Predrill 4 holes, attach 2 posts w/ 3-1/2” long exterior decking screws. Make sure posts are parallel.
Tools
Materials
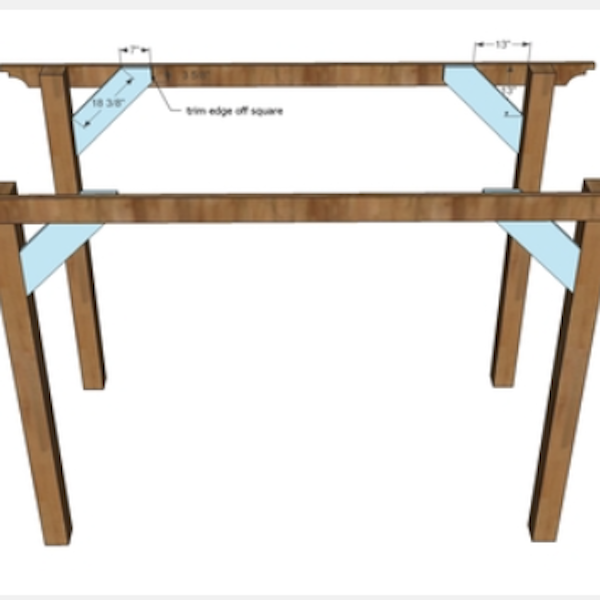
STEP 2
Check to make sure posts are parallel. Attach cross supports to posts & rafters. To attach to rafters, use 2-1/2” exterior deck screws. To attach to posts, drill 1-1/2” pocket holes. Use 2-1/2” pocket hole screws.
Tools
Materials
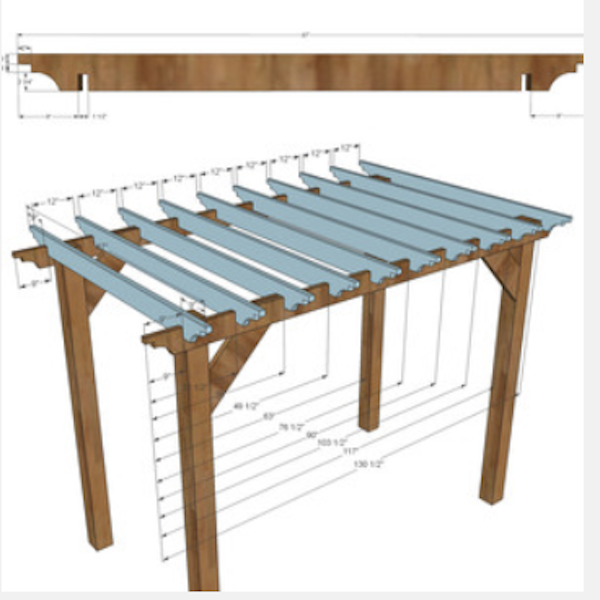
STEP 3
Notch out rafters by setting saw blade depth of circular saw to 2-3/4”, and make cuts every 1/4” in the wood to be removed. Use a chisel to remove wood.
Tools
STEP 4
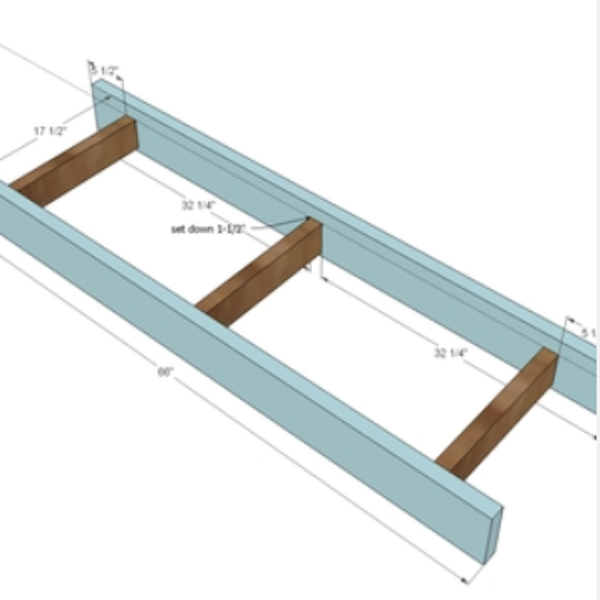
Begin building shelves by attaching 17-1/2” 2x4s to 66” 2x6s with 2-1/2” exterior deck screws, predrilling holes, with 2 screws per joint.
Tools
Materials
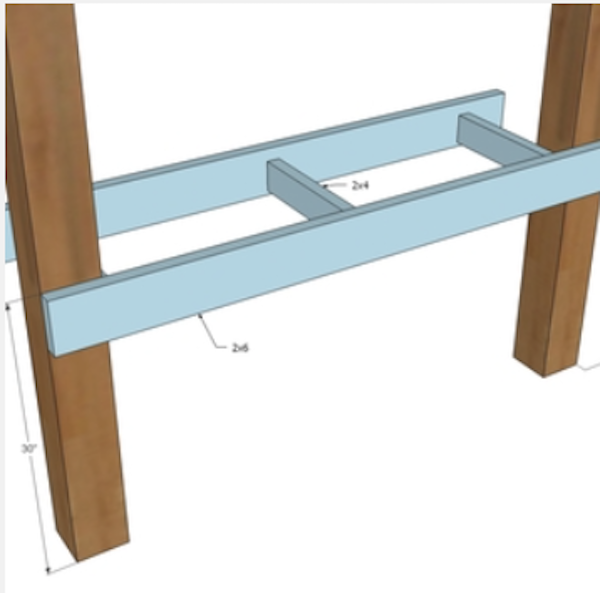
STEP 5
Use 3-1/2” exterior deck screws to attach shelves to posts. Predrill holes and attach through both 2x4s and 2x6s.
Tools
STEP 6
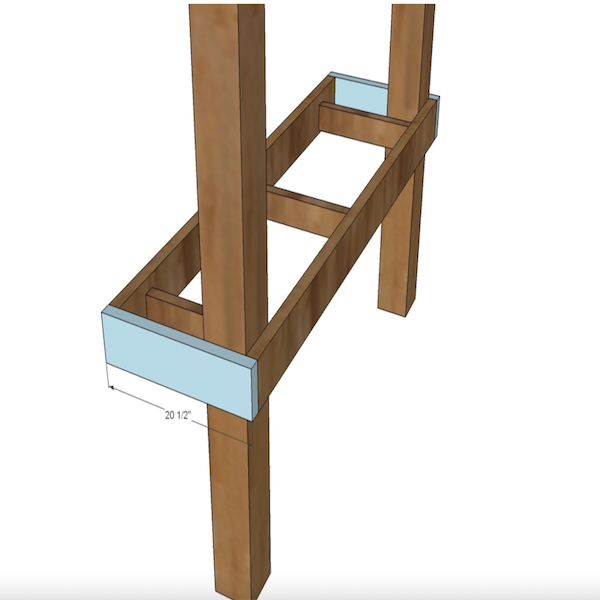
Predrill holes and attach 20-1/2” long 2x6 to ends of shelf 2x6 boards with 2-1/2” exterior wood screws.
Tools
Materials
STEP 7
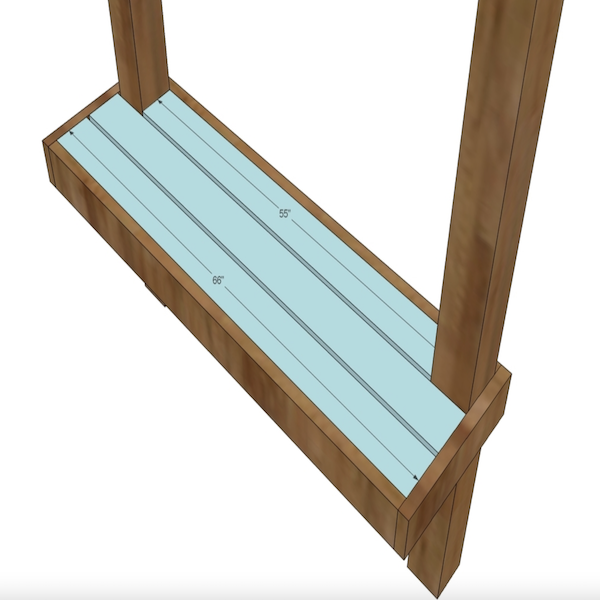
Lay seat boards in place. Attach to 2x4 framing with 2-1/2” exterior deck screws through predrilled holes.
Tools
Materials
STEP 8
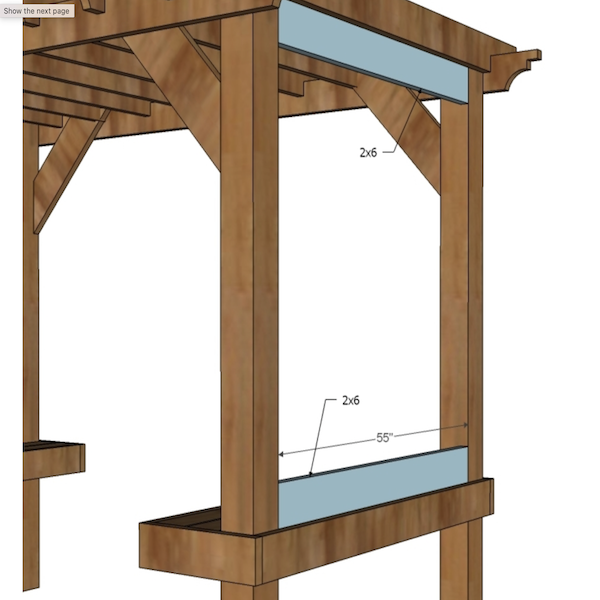
Drill (2) 1-1/2” pocket holes on each end of 2x6 boards that are 55” long. Attach to posts with 2-1/2” pocket hole screws.
Tools
Materials
STEP 9
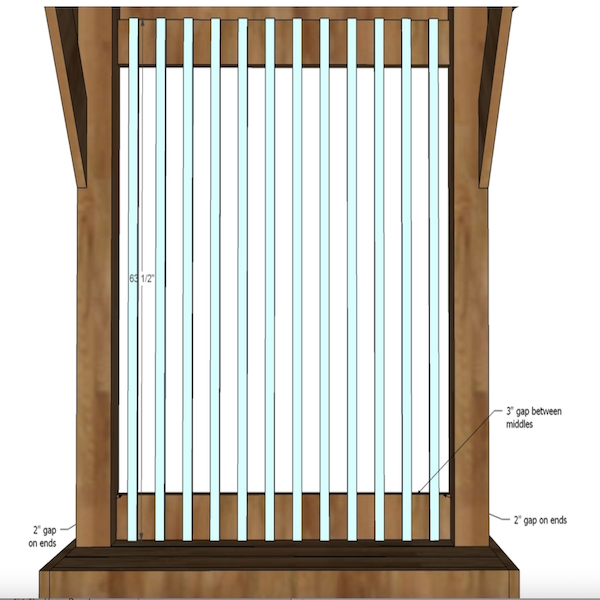
Use 2” staplers to attach vertical lattice boards to 2x6s from previous step. Start 1-1/2” offset from center and work outward. TIP: Use (2) 3” wood scrap blocks as spacers.
Tools
STEP 10
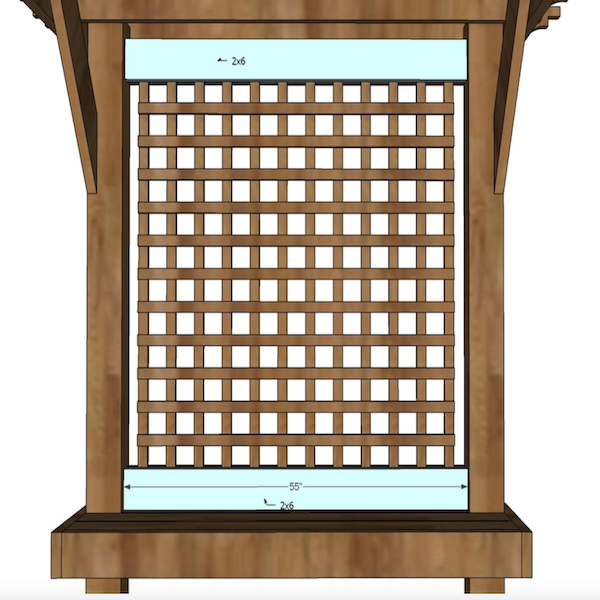
Attach horizontal lattice boards to the vertical lattice boards with 1-1/4” staples. Spacing between boards is 3”.
Tools
Materials

STEP 11
Trim inside edges of lattice with 2x6 boards. Attach to posts with 1-1/2” pocket holes and 2-1/2” pocket hole screws.
Tools
Materials
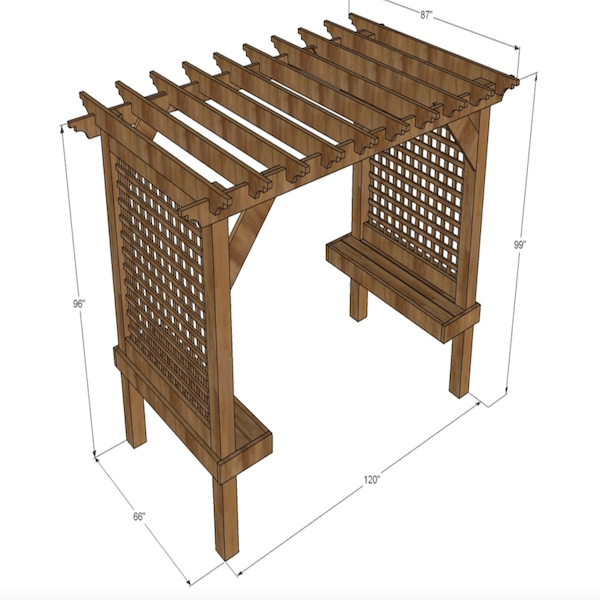
STEP 12
Here is the entire rendering of the pergola's dimensions.