Steps
STEP 1
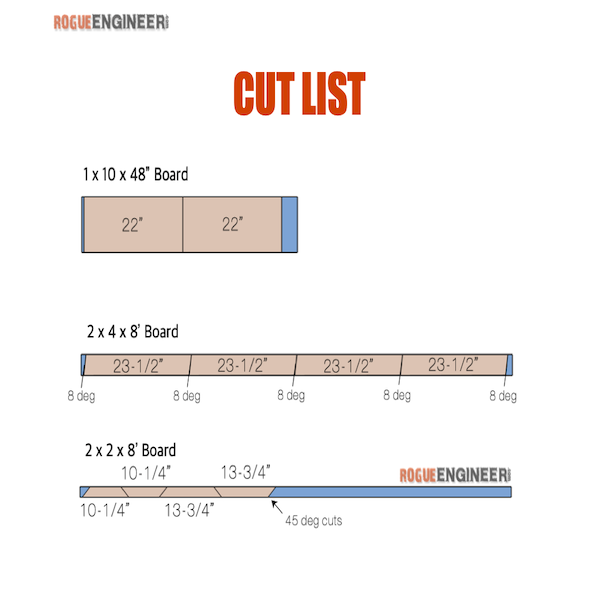
Cut all wood according to the Cut List (also found in the project plan PDF).
Tools
Circular Saw
Materials
1" x 10" x 4' Board, 2" x 2" x 8' Board, 2" x 4" x 8' Board
STEP 2
Using a straight edge, mark the cut line. Then clamp and cut the taper on each leg (4) with a circular saw. (View in project plan PDF)
Tools
Circular Saw
Materials
2" x 4" x 8' Board
STEP 3
Drill pocket holes, then assemble base temporarily with 2" brad nails while upside down. Then turn right-side up, and complete assembly with 2-1/2" pocket screws. (View diagram in project plan PDF)
Tools
Brad Nailer, Drill
Materials
Pocket Hole Jig, 2" Brad Nails, 2-1/2" Pocket Screws
STEP 4
Drill Pocket holes and assemble top with 1-1/4" pocket screws. The top is made from the (2) 1" x 10" x 22" boards you cut in step 1. (View diagram in project plan PDF)
Tools
Drill
Materials
Pocket Hole Jig, 1-1/4" Pocket Screws
STEP 5
Center base on bottom of the table top and attach with 2" screws. (View diagram in project plan PDF)
Tools
Drill
Materials
2" Screws