Steps
Step 1
Cut out all material using Lumber & Sheet Cut Layout Guide.Some initial sanding can be done after cutting boards and panels. Sanding pieces prior to building can make the process easier before final assembly.
Tools
Step 2
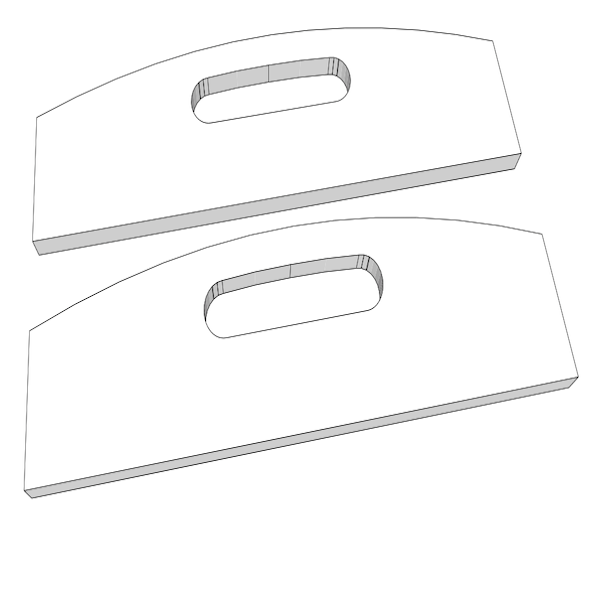
Follow measurements in diagram on Page 3 to cut out (2) side panels. Draw an arch to outline the top of each panel. Use a 1” spade bit to cut a hole for hand opening. Then use jig saw to complete hand opening.
Tools
Step 3
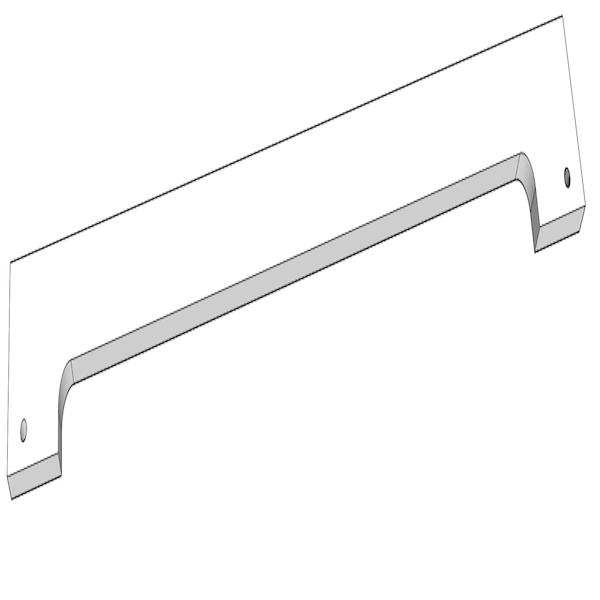
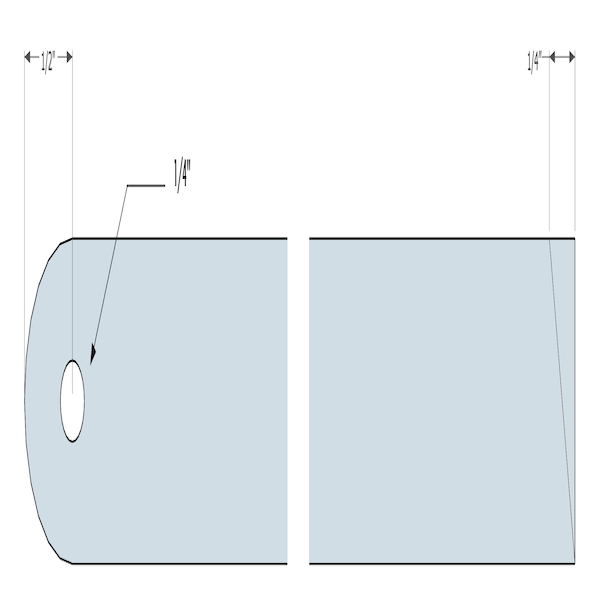
Follow measurements in diagram on Page 4 to cut out back panel. Use 1” spade bit to cut curve in handle on each end. Use jig saw to finish cutting handle. Drill 1/4" holes on each end as shown in diagram to right.
Tools
STEP 4
Follow measurements in diagram on p. 4 to cut out front panel. Use 1” spade bit to cut curve in handle on each end. Use a jig saw to finish cutting handle. Use rotary tool to smooth inside edge. Drill 1/4" holes on each end.
Tools
Step 5
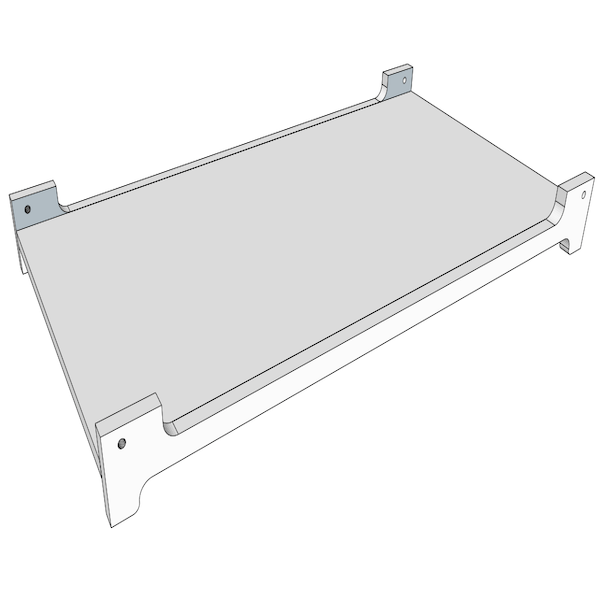
Align the front and back panels to the tray base. Glue and nail together with brad nails.
Tools
Materials
STEP 6
Align the side panels to the tray. Glue and nail together with brad nails.
Tools
Materials
STEP 7
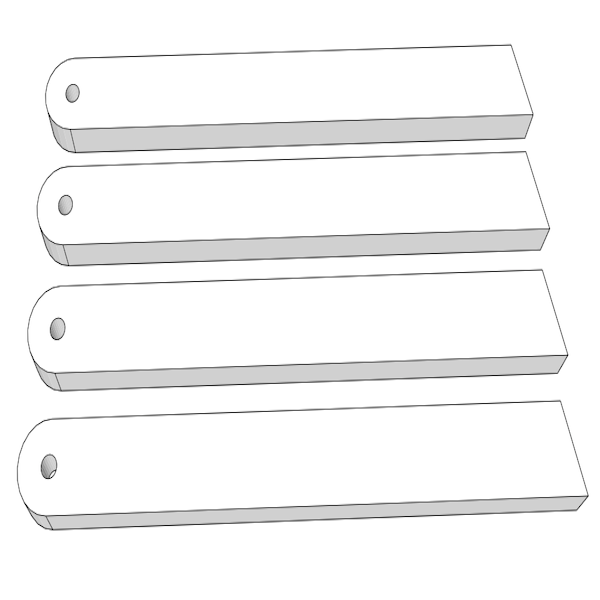
Refer to the diagram below for the measurements on the legs.
Tools
STEP 8
Cut out all (4) legs. Prime one end to half circle and drill 1/4" hole at center. On opposite end, cut 15 degree angle or measure 1/4", then cut.
Tools
STEP 9
Measure 1” from the long end of the angle cut on each leg. Mark a line. Align the support to this line.
Tools
Materials

STEP 10
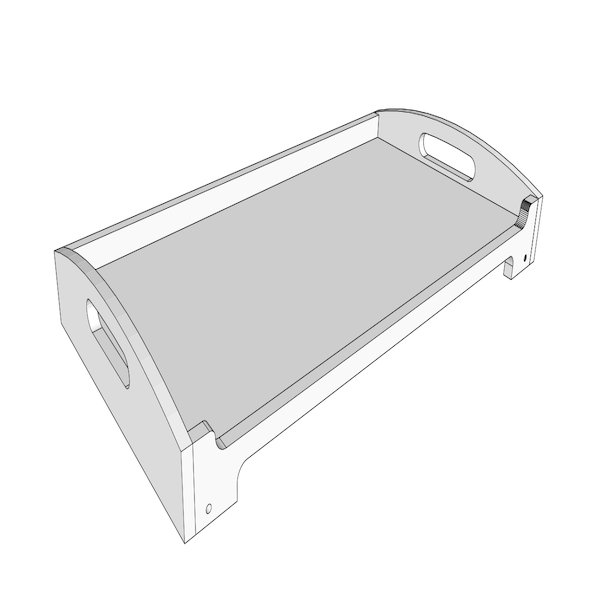
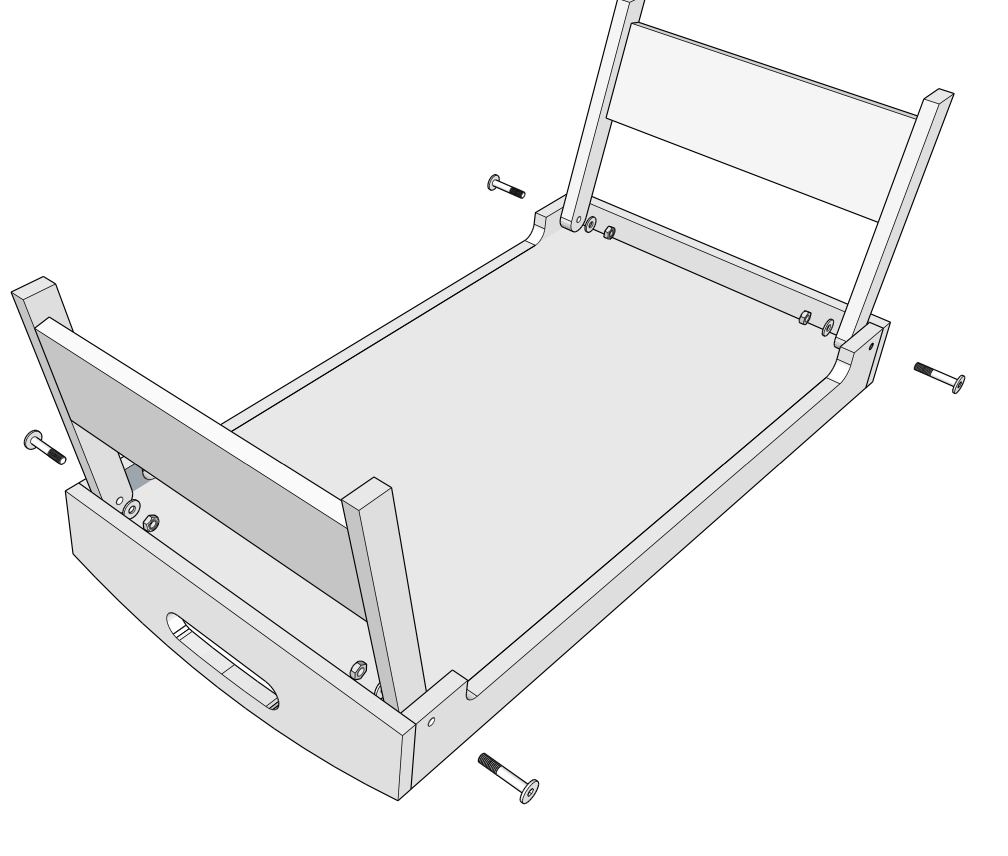
Attach the legs to the tray using connecting bolts. Leave a small gap between the nut and washer so the legs can swing freely.
Materials
STEP 11
Sand and finish to your desire.