Steps
STEP 1
Cut out all material using the Lumber & Sheet Cut Layout Guide. (Shown in project plans PDF)
Tools
Materials
STEP 2
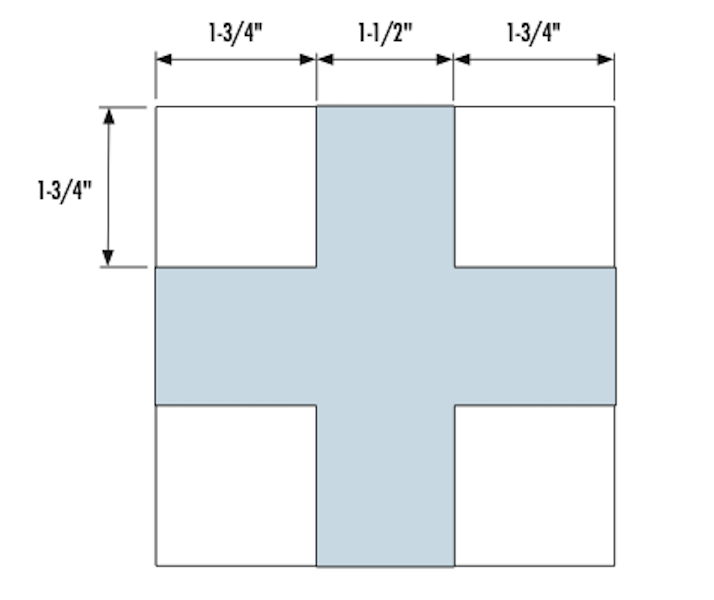
Mark a line parallel to the edge of the 1/2" sheet of plywood that is 5" from the edge. Cut with a circular saw. Cut (5) 5" x 5" squares with a miter saw. Follow diagram to mark measurements for the X shape.
Tools
Materials
STEP 3
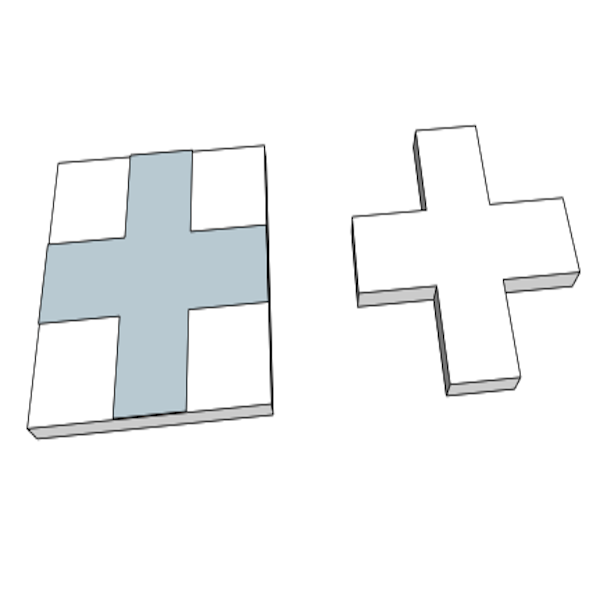
Clamp the 5" x 5" squares to a secure surface and cut the X shape out with a jigsaw.
Tools
Materials
STEP 4
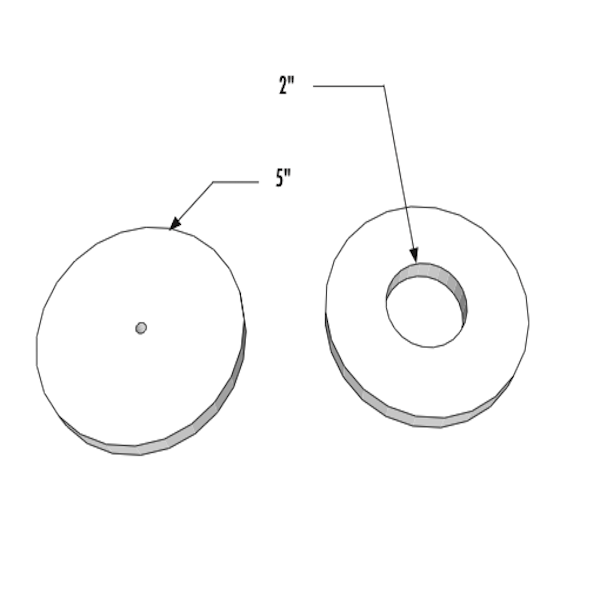
Use a 5" hole saw to cut (5) circles out of the 1/2" sheet of plywood. Clamp the circles to a secure working surface. Use the pilot hole from the 5" hole saw as a guide to cut a 2" hole.
Tools
Materials
STEP 5
Use a 1/8" round over bit and router to go over all edges of X and O pieces. Sand as needed.
Tools
Materials
STEP 6
Sand the top and the bottom of the 3/4" x 18" x 18" Project Plywood Board. Be sure to leave the edges and corners sharp.
Tools
Materials
STEP 7
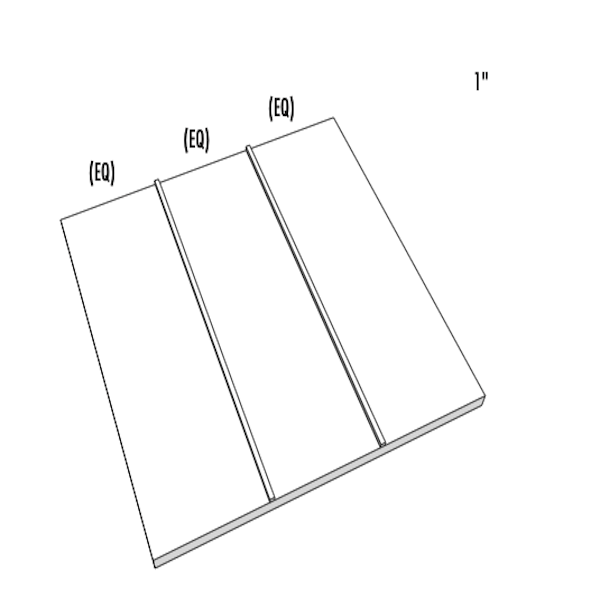
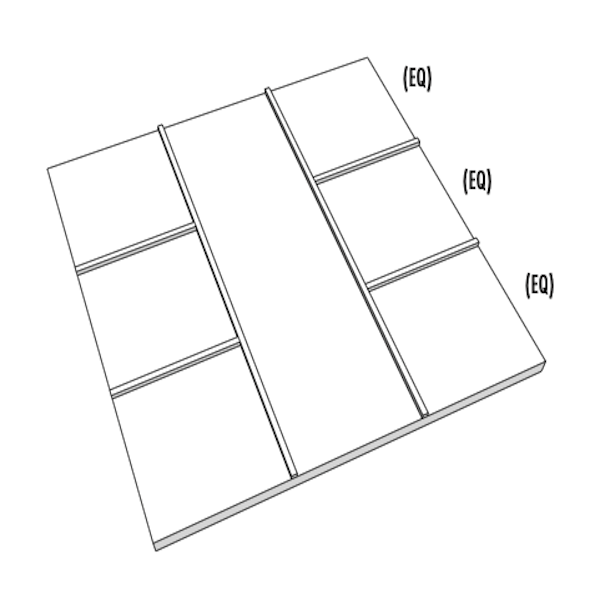
Divide the 18" x 18" board vertically into (3) equal parts. Place the center of each 1/4" x 18" square dowel on each line. Glue and nail to the base board.
Tools
Materials
STEP 8
Divide the board horizontally into (3) equal parts. Place the 5-7/8" pieces of the 1/4" square dowel on the outside lines drawn. Glue and nail to the board.
Tools
Materials
STEP 9
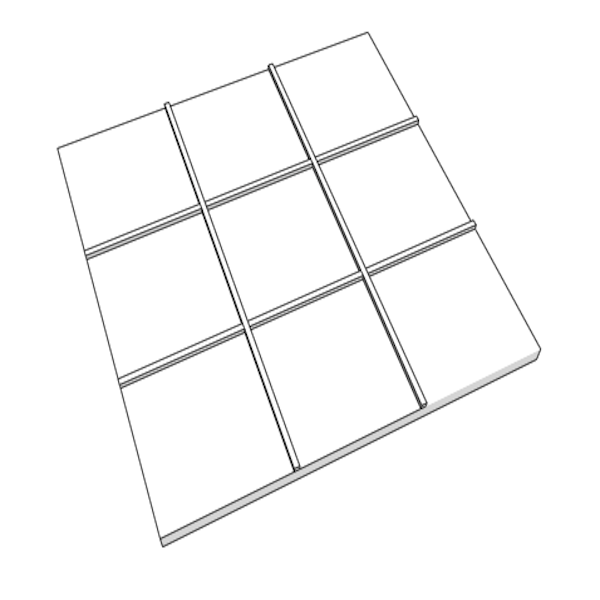
Place the (2) 5-3/4" inside partition segments of the 1/4" square dowel in line with the outside segments. Glue and nail to the board.
Tools
Materials
STEP 10
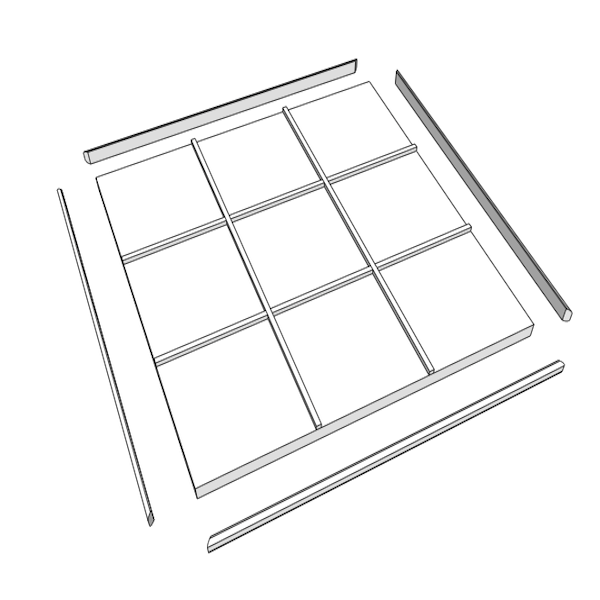
Align the (4) perimeter strips of the 1/4" x 3/8" moulding along the edge of the base board. Glue and nail together.
Tools
Materials
STEP 11
Project complete!